DIGITAL PHOTOGRAPHY
Even ten years ago photography of prepared microslides and microorganisms was a time-consuming science in itself involving much skill and experience. Today really excellent pictures can be produced with little effort by using commercially available digital cameras in connection with image-editing programmes; however, normal cameras cannot be attached to the microscope by using an adapter.
Since with regard to this problem
we constantly receive questions from amateurs regarding this problem two simple
solutions of the problem are presented here: You need a simple monocular eyetube
(usually at hand) and a special eyepiece of high magnification made for persons
who look into the eyepiece with spectacles (usually not at hand).
|
Mount the camera on a tripod and
choose the maximum zoom factor (2.5x or 3x), adjust the objective of the camera
precisely aligned with the eyepiece and make an allowance between the objective
and the eyepiece of about 2 mm. Then zoom back to factor 1. Now move the tripod
gently back and forth until there is a small round image in the middle of the
screen, evenly lit (pretty critical), then zoom in further until the entire
display is illuminated. Trigger the camera via the 10-second automatic.
To avoid disappointment you should
perform the above procedure in a shop specializing in optical equipment to be
sure to purchase the right eyepiece!
Depending on the optics of the
camera also so-called "projectives" with low magnification may be
of good use.
When using an inadequate combination of camera and eyepiece, strong colour fringes may show close to the edges of the image, which become visible only when viewing the digitized image.
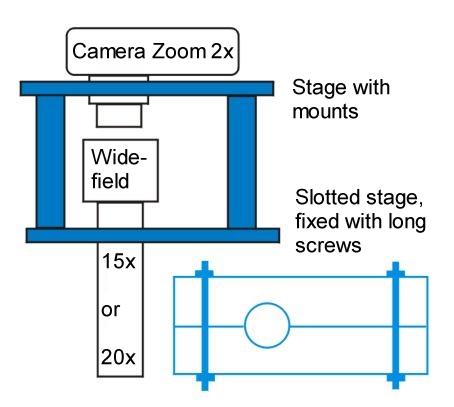
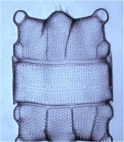
It is much better to make a camera
mount yourself, an example is given here. It is best to use hard plastic (e.g.
PERTINAX) or hardwood of 10 mm thickness as construction material.
It is always difficult to mount
the camera, since the movable objective cannot be used for this purpose! Fix
several support points on the upper board (L-shaped blocks into which the camera
can be inserted tightly), then fix the camera with a thick rubber band to prevent
the casing from being damaged. Make sure that at any zoom-position a distance
of at least 2 mm remains between the lens and the eyepiece! It is safest to
construct the camera mount in such a way that between the eyepiece and the objective
remains a distance of 8 to 10 mm.This can be gradually reduced later by inserting
rings made of wire or sheet metal between the tube and the eye-piece.
Proper illumination of the visual
field can be tested with zoom level 1: The small round image must be completely
illuminated without crescent-shaped shadows!
It is important to turn off the
autofocus. Choose "landscape" in the menu or a similar icon: The camera
optic is then fixed to "infinite". If this should be impossible, you
must outwit the system: Press the trigger half-way and wait until the autofocus
has done its work. Then bring the important parts of the image into focus again
by readjusting the microscope using the micrometer-screw. Now press the trigger
towards the chock. Use the automatic delay of 10 seconds (better 2 seconds,
if available).
Often focussing on delicate structures
(diatoms) or on low-contrast structures (ciliata) is impossible due to the camera
display. In such cases focus on the desired structure without the camera and
observe at the same time the behaviour of a subtle structure with very high-contrast
(grains, slots, etc.). Remember the image of this contrasting structure and
focus later so that this structure looks exactly the same on the camera screen.
Then you can be sure that the expected structure will be clearly shown, too.
The sharpness at a high magnification
level can be improved considerably if a green filter is used, better still (albeit
expensive) is an interference filter which transmits only green light. Later
the color format is converted to <8-bit grayscale> and then back to <RGB>.
The latter is necessary to again activate all options of an image editing program.
Quasi-3D-photography with the program HELICON-FOCUS
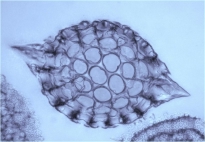
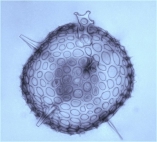
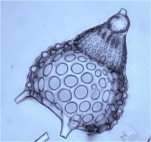
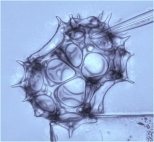
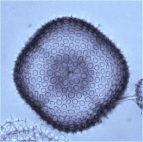
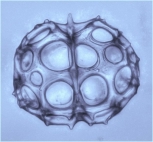
Light microscopes always show a limited depth of field in the case of high magnifications - round objects, such as radiolarians or foraminifers, produce unsatisfactory photomicrographs. Digital photography is a remedy: First a series of photomicrographs is made, using high magnification in combination with an aperture diaphragm opened completely. Picture by picture the eyetube is constantly lowered by 2 um (or less). The series should consist of at least 20 pictures. The whole series is transferred to the program HELICON FOCUS and processing is started by clicking the <RUN> button .The programme now superimposes the many individual images to form an overall picture of high depth of field. This program can be downloaded from the internet (test time 1 month).
 |
 |
 |
 |
|
| Synthesized image |
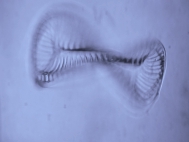
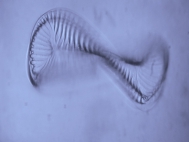
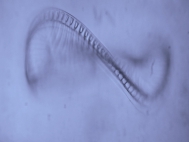
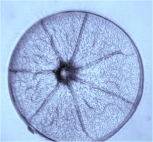
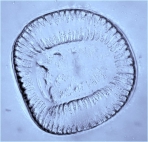
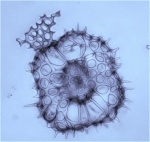
The pictures above show four of such
sectional images out of a series of 30 images, reproduced here only in low image
quality. The following image displays the synthesized picture created by HELICON-FOCUS,
post processed by using COREL PHOTO-PAINT 8
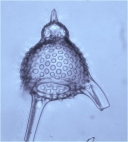
Here are some more examples showing the performance of HELICON-FOCUS .
 |
 |
 |
 |
||
| Diatom 1 | Diatom 2 | Diatom 3 | Foraminifer 1 |
 |
 |
 |
 |
||
| Radiolarian 1 | Radiolarian 2 | Radiolarian 3 | Radiolarian 4 |
 |
 |
 |
 |
||
| Radiolarian 5 | Radiolarian 6 | Radiolarian 7 | Radiolarian 8 |
 |
|||||
| Radiolarian 9 |
The pictures clearly demonstrate
the efficiency of HELICON-FOCUS,
especially the larger versions (click on the photos!). The three shown diatoms
are the natural enemies of the micro-photographer: No.1 is barrel-shaped, No.2
has the shape of a very sharp hat you look at from top and No.3 is saddle-shaped.
HELICON-FOCUS has a number of advantages:
1. Simple and clear operation
2. High speed
3. Representation of the progressive construction of the final picture (single
pictures which decrease the quality can be identified and deleted)
4. Automatic adjustment of single pictures (slight shifts and rotations of the
individual images are compensated)
But the program also has its limits: HELICON FOCUS suppresses translucent structures that are obscured by structures in the foreground. This is particularly well exemplified by Radiolarian No.6 (the inner sphere is only dimly reproduced) and the example of Radiolarian No.5 (the posterior structures can only be recognized if they are directly visible through openings in the skeleton). So the synthesized image is similar to images produced with a reflected light microscope. This improves the clarity of the image and the 3D-representation. On the other hand the reconstruction of three-dimensional fine structures (diatoms) is not possible with HELICON FOCUS - here SEM is clearly superior, not only because of its higher resolution. Plant cuts produce unsatisfactory results, because there are too many overlaps out of focus.
Finally a suggestion for specialists: If the microscope has an old fashioned Abbé-condenser with sliding condenser diaphragm the production of stereo-image pairs is possible: Make two series of pictures, both series with a different lateral adjustment of the diaphragm. The two synthesized images (8 x 8 cm) must be mounted directly side by side. Then the object appears three-dimensional when using a stereoscope.
See also: 3D-images generated with the stacking program PICOLAY.
Copyright: webmaster@mikrohamburg.de